
Homegrown Tomatoes, is there anything that tastes quite as good? I think not! Imagine biting into a juicy, sun-ripened tomato, bursting with flavor, knowing you nurtured it from a tiny seed. That’s the magic of growing your own, and this DIY guide is your ticket to tomato-growing success, even if you think you have a “brown thumb.”
For centuries, cultivating tomatoes has been a cherished tradition. Originating in South America, these vibrant fruits journeyed across continents, becoming a staple in cuisines worldwide. From Italian sauces to refreshing summer salads, the tomato’s versatility is undeniable. But store-bought tomatoes often lack the intense flavor of their homegrown counterparts. That’s where this guide comes in!
Let’s be honest, buying tomatoes from the grocery store can be disappointing. They’re often bland, watery, and picked before they’re truly ripe. But with a few simple DIY tricks, you can transform your backyard, balcony, or even a sunny windowsill into a thriving tomato garden. This Homegrown Tomatoes DIY guide will walk you through every step, from selecting the right varieties to troubleshooting common problems. I’m going to share my favorite tips and hacks to ensure you’re harvesting baskets full of delicious, vibrant tomatoes all season long. Get ready to impress your friends and family with the incredible taste of your very own homegrown bounty!
Growing Delicious Tomatoes at Home: A Step-by-Step Guide
Okay, tomato lovers, let’s get our hands dirty! I’m going to walk you through everything you need to know to grow plump, juicy, and flavorful tomatoes right in your own backyard (or even on your balcony!). Trust me, there’s nothing quite like the taste of a homegrown tomato, and it’s way easier than you might think.
Choosing the Right Tomato Variety
Before we even think about soil, we need to pick our tomato stars! There are literally hundreds of varieties, so it can be a little overwhelming. Here’s a breakdown to help you choose:
* **Determinate vs. Indeterminate:** This is crucial!
* **Determinate:** These are bush-type tomatoes that grow to a certain size and then stop. They produce most of their fruit all at once, making them great for canning or making sauce. Think Roma or Celebrity.
* **Indeterminate:** These are vining tomatoes that keep growing and producing fruit throughout the season. They need staking or caging. Think Beefsteak, Cherry, or Heirloom varieties.
* **Size and Use:**
* **Cherry Tomatoes:** Small, sweet, and perfect for snacking or salads.
* **Grape Tomatoes:** Similar to cherry tomatoes but more oblong.
* **Roma Tomatoes:** Paste tomatoes, ideal for sauces and canning.
* **Beefsteak Tomatoes:** Large, meaty tomatoes perfect for sandwiches.
* **Heirloom Tomatoes:** These are older varieties with unique flavors and colors. They can be a bit more finicky but are totally worth it!
* **Disease Resistance:** Look for varieties labeled with letters like V, F, N, T, or A. These indicate resistance to common tomato diseases like Verticillium wilt, Fusarium wilt, Nematodes, Tobacco Mosaic Virus, and Alternaria.
My personal favorites are Early Girl (reliable and early!), Roma (sauce heaven!), and a good heirloom like Brandywine (the flavor is incredible!).
Starting Your Tomato Plants
You have two main options here: starting from seed or buying seedlings. I usually do both! Starting from seed gives you more variety options, but buying seedlings is faster and easier.
Starting from Seed (Indoor)
This is how I get a head start on the season.
1. **Gather Your Supplies:** You’ll need:
* Tomato seeds (obviously!)
* Seed starting trays or small pots
* Seed starting mix (this is different from regular potting soil – it’s lighter and sterile)
* A spray bottle
* A heat mat (optional, but helpful)
* A grow light (also optional, but highly recommended)
2. **Sow the Seeds:** Fill your trays or pots with seed starting mix. Moisten the mix with the spray bottle – you want it damp, not soggy. Plant 2-3 seeds per cell or pot, about ¼ inch deep.
3. **Provide Warmth and Light:** Place the trays on a heat mat (if using) and under a grow light (if using). If you don’t have a grow light, a sunny windowsill will work, but you’ll need to rotate the trays regularly to prevent the seedlings from getting leggy.
4. **Keep the Soil Moist:** Mist the soil with the spray bottle whenever it starts to dry out. Don’t overwater!
5. **Thin the Seedlings:** Once the seedlings have their first true leaves (the second set of leaves that appear after the initial seed leaves), thin them to one seedling per cell or pot. Snip off the weaker seedlings at the soil line with scissors. Don’t pull them out, as this can disturb the roots of the remaining seedling.
6. **Harden Off the Seedlings:** About a week before you plan to transplant them outdoors, you need to “harden off” the seedlings. This means gradually exposing them to outdoor conditions. Start by placing them outside in a sheltered spot for an hour or two each day, gradually increasing the time each day. This will help them adjust to the sun, wind, and temperature changes.
Buying Seedlings
This is the quicker route, but still requires careful selection.
1. **Choose Healthy Seedlings:** Look for seedlings that are about 6-8 inches tall, with thick stems and healthy green leaves. Avoid seedlings that are leggy (tall and spindly), yellowed, or have spots on their leaves.
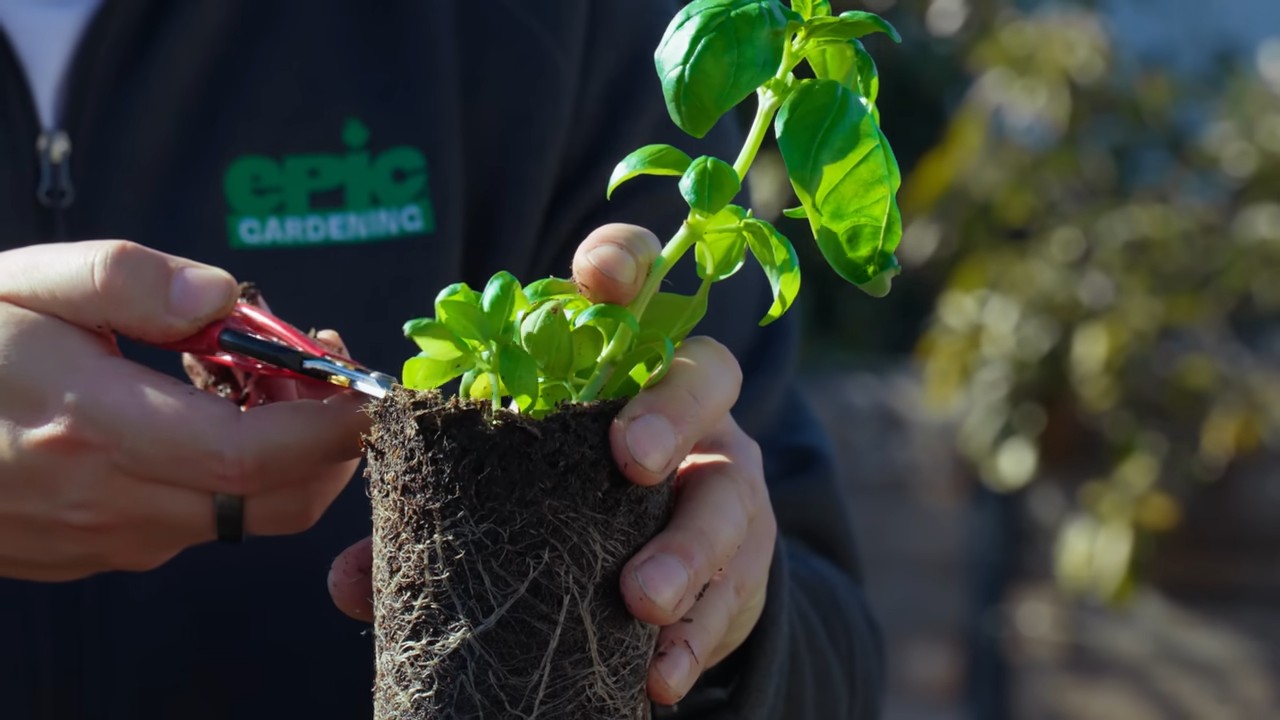
2. **Check the Roots:** Gently remove a seedling from its pot and inspect the roots. They should be white and healthy-looking, not brown and root-bound (tightly circling the pot).
3. **Harden Off the Seedlings:** Even if you buy seedlings, it’s still a good idea to harden them off for a few days before planting them in the ground.
Preparing the Planting Site
Tomatoes are sun-worshippers! They need at least 6-8 hours of direct sunlight per day. They also need well-drained soil that is rich in organic matter.
1. **Choose a Sunny Location:** Find a spot in your garden that gets plenty of sunlight.
2. **Prepare the Soil:** Dig a hole that is twice as wide and twice as deep as the root ball of your tomato plant. Amend the soil with compost or other organic matter. This will improve drainage and provide nutrients for your plants. I like to add a handful of bone meal to the hole as well – it helps with root development.
3. **Check the Soil pH:** Tomatoes prefer a slightly acidic soil pH of around 6.0-6.8. You can test your soil pH with a soil testing kit. If your soil is too alkaline, you can amend it with sulfur.
Planting Your Tomato Plants
Now for the fun part!
1. **Plant Deep:** This is a tomato-growing secret! When you plant your tomato plants, bury the stem up to the first set of leaves. Tomatoes can grow roots along their stems, so planting deep will help them develop a stronger root system.
2. **Remove the Bottom Leaves:** Before planting, remove the bottom leaves from the stem that will be buried. This will prevent them from rotting.
3. **Space Them Properly:** Space your tomato plants according to the variety. Determinate varieties can be planted closer together (about 2-3 feet apart), while indeterminate varieties need more space (about 3-4 feet apart).
4. **Water Thoroughly:** After planting, water your tomato plants thoroughly. This will help them settle in and establish their roots.
Supporting Your Tomato Plants
Indeterminate tomato varieties need support to keep them from sprawling on the ground. This will help prevent disease and make it easier to harvest the fruit.
1. **Choose Your Support Method:** There are several options for supporting tomato plants:
* **Stakes:** Drive a sturdy stake into the ground next to each plant and tie the main stem to the stake with soft twine.
* **Cages:** Place a tomato cage around each plant.
* **Trellises:** Train your tomato plants to grow up a trellis.
2. **Provide Support Early:** It’s best to provide support for your tomato plants when you first plant them. This will prevent them from falling over and getting damaged.
Caring for Your Tomato Plants
Consistent care is key to a bountiful harvest.
1. **Water Regularly:** Water your tomato plants deeply and regularly, especially during hot, dry weather. Aim for about 1-2 inches of water per week. Water at the base of the plant to avoid wetting the leaves, which can lead to disease.
2. **Fertilize Regularly:** Tomatoes are heavy feeders, so they need regular fertilization. Use a balanced fertilizer (like 10-10-10) or a tomato-specific fertilizer. Follow the instructions on the fertilizer package. I like to fertilize every 2-3 weeks.
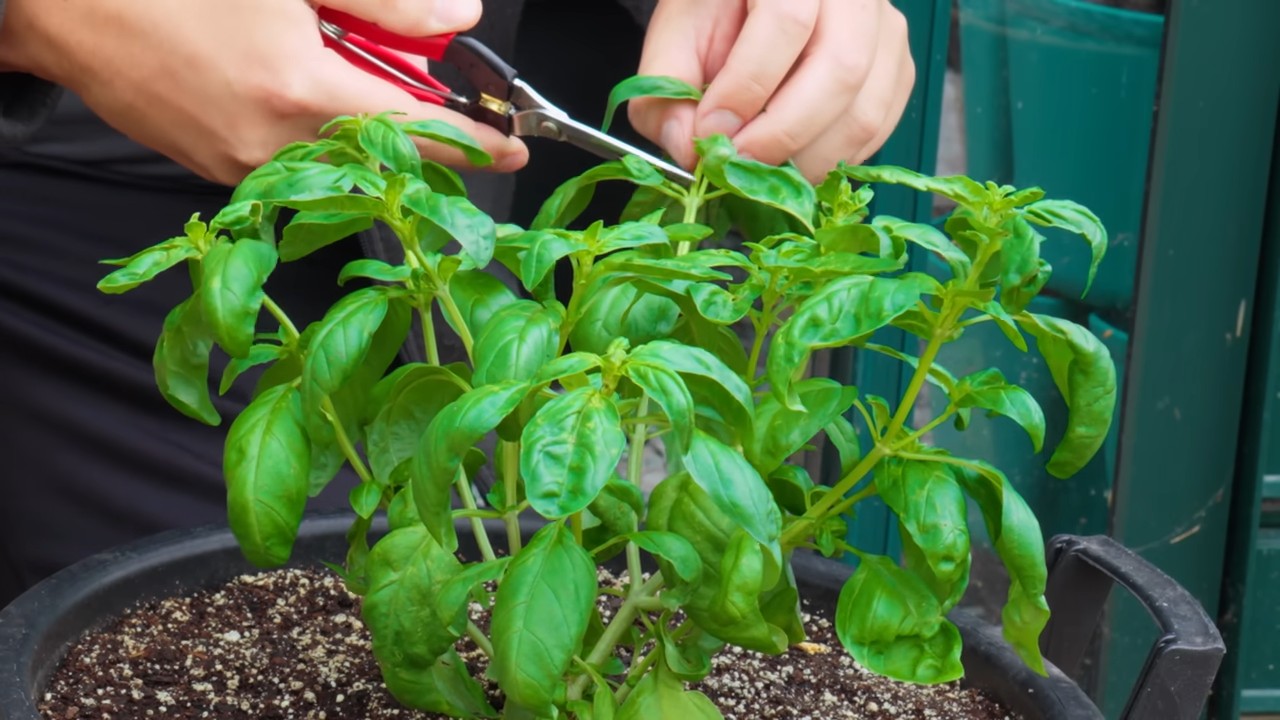
3. **Prune Your Tomato Plants:** Pruning can help improve air circulation and encourage fruit production. Remove suckers (the small shoots that grow in the crotch between the main stem and the branches) from indeterminate varieties. Determinate varieties don’t need as much pruning.
4. **Watch Out for Pests and Diseases:** Keep an eye out for common tomato pests like aphids, tomato hornworms, and whiteflies. You can control these pests with insecticidal soap or other organic pest control methods. Also, watch out for common tomato diseases like early blight, late blight, and blossom end rot. Prevent these diseases by providing good air circulation, watering at the base of the plant, and using disease-resistant varieties.
5. Mulch, Mulch, Mulch! Add a layer of mulch around your tomato plants to help retain moisture, suppress weeds, and regulate soil temperature. Straw, wood chips, or shredded leaves work well.
Dealing with Common Tomato Problems
Even with the best care, you might encounter some problems. Here’s how to tackle a few common ones:
* **Blossom End Rot:** This is caused by a calcium deficiency. The bottom of the tomato turns black and leathery. To prevent blossom end rot, make sure your soil has enough
Conclusion
So, there you have it! Transforming ordinary homegrown tomatoes into culinary masterpieces is not only achievable but surprisingly simple with this DIY trick. We’ve walked you through the process, highlighting the ease and affordability of elevating your tomato harvest. But why is this a must-try? Because it unlocks a depth of flavor and versatility you simply won’t find in store-bought processed options. Think of the vibrant sauces, the sun-dried tomato pesto bursting with summer’s essence, or the deeply flavorful tomato paste that forms the foundation of countless dishes. This isn’t just about preserving tomatoes; it’s about preserving the taste of summer and infusing your cooking with unparalleled quality.
This DIY approach empowers you to control every aspect of the process, from the ripeness of the tomatoes to the intensity of the flavors. You know exactly what goes into your food, avoiding artificial preservatives and additives. Plus, it’s incredibly satisfying to create something so delicious from scratch, using the fruits (literally!) of your own labor.
Don’t be afraid to experiment! Consider adding roasted garlic cloves to your tomato sauce for a richer, more complex flavor. Infuse your sun-dried tomatoes with herbs like rosemary or thyme for an aromatic twist. For a spicier kick, incorporate a pinch of red pepper flakes into your tomato paste. The possibilities are endless, and the only limit is your imagination. You can even try different varieties of tomatoes to see how they affect the final product. Roma tomatoes are known for their meaty texture and low water content, making them ideal for tomato paste, while heirloom varieties offer a wider range of flavors and colors for sauces.
This DIY guide to processing your homegrown tomatoes is more than just a recipe; it’s an invitation to connect with your food, to appreciate the bounty of nature, and to unleash your inner culinary artist. It’s about taking pride in creating something truly special, something that reflects your own unique taste and style.
We wholeheartedly encourage you to give this DIY trick a try. Gather your homegrown tomatoes, follow our simple steps, and prepare to be amazed by the results. Once you’ve experienced the difference, you’ll never look at store-bought tomato products the same way again.
And most importantly, we want to hear about your experience! Share your photos, your tips, and your variations with us. Let us know what worked for you, what you learned, and what delicious creations you’ve made with your homemade tomato products. Join the community of home cooks who are rediscovering the joy of preserving and savoring the flavors of summer, all year round. Your feedback will not only inspire others but also help us refine and improve this guide for future tomato enthusiasts. So, get cooking, get creative, and get sharing! Let’s celebrate the deliciousness of homegrown tomatoes together!
Frequently Asked Questions (FAQ)
What types of tomatoes are best for making sauce and paste?
Generally, meaty tomatoes with fewer seeds and lower water content are ideal for sauces and pastes. Roma, San Marzano, and other paste tomatoes are excellent choices. Heirloom varieties can also be used, but they may require a bit more cooking time to reduce the water content. Experiment with different varieties to find your personal favorite flavor profile. For example, Brandywine tomatoes offer a rich, complex flavor, while Cherokee Purple tomatoes have a slightly smoky taste.
How do I remove the skins and seeds from my tomatoes easily?
The easiest way to remove skins is to blanch the tomatoes. Score an “X” on the bottom of each tomato, then drop them into boiling water for 30-60 seconds, or until the skins start to peel back. Immediately transfer them to an ice bath to stop the cooking process. The skins should then slip off easily. To remove seeds, simply cut the tomatoes in half and gently squeeze out the seeds. You can also use a spoon to scoop them out. Some people prefer to leave the seeds in for added flavor and nutrients, but removing them will result in a smoother sauce or paste.
How long will homemade tomato sauce and paste last?
Properly canned tomato sauce and paste can last for 12-18 months in a cool, dark place. Always follow safe canning practices to ensure proper sealing and prevent spoilage. If you’re freezing your sauce or paste, it can last for 6-8 months. Be sure to use freezer-safe containers or bags and leave some headspace for expansion. Once opened, homemade tomato sauce and paste should be stored in the refrigerator and used within a week.
Can I use frozen tomatoes to make sauce and paste?
Yes, you can absolutely use frozen tomatoes! In fact, freezing tomatoes is a great way to preserve them if you don’t have time to process them immediately. Simply thaw the tomatoes before using them in your sauce or paste recipe. Keep in mind that frozen tomatoes may release more water than fresh tomatoes, so you may need to cook the sauce or paste for a longer period of time to achieve the desired consistency.
What if my tomato sauce is too watery?
If your tomato sauce is too watery, there are several things you can do to thicken it. First, continue simmering the sauce over low heat, uncovered, to allow excess moisture to evaporate. You can also add a tablespoon or two of tomato paste to help thicken the sauce. Another option is to add a cornstarch slurry (1 tablespoon cornstarch mixed with 2 tablespoons cold water) to the sauce while it’s simmering. Be sure to stir the slurry in well and allow the sauce to simmer for a few minutes to thicken.
How do I know if my canned tomato sauce or paste has spoiled?
Always check the seal on your canned tomato sauce or paste before using it. If the lid is bulging, the seal is broken, or the contents look or smell unusual, discard the jar immediately. Do not taste the contents, as spoiled canned goods can contain harmful bacteria. It’s always better to be safe than sorry when it comes to food safety.
Can I add other vegetables to my tomato sauce?
Absolutely! Adding other vegetables to your tomato sauce is a great way to enhance the flavor and nutritional value. Onions, garlic, carrots, celery, and bell peppers are all excellent additions. You can sauté these vegetables before adding the tomatoes to create a deeper, more complex flavor. Roasting the vegetables before adding them to the sauce can also add a delicious smoky flavor.
What are some creative ways to use homemade tomato paste?
Homemade tomato paste is incredibly versatile and can be used in a wide variety of dishes. Use it as a base for soups, stews, and chili. Add it to sauces for pasta, pizza, and meat dishes. Spread it on sandwiches and wraps for a burst of flavor. Mix it with olive oil, garlic, and herbs to create a flavorful marinade for grilled meats and vegetables. You can even use it to make homemade ketchup or barbecue sauce. The possibilities are endless!
Is it necessary to add sugar to tomato sauce?
Adding a small amount of sugar to tomato sauce can help to balance the acidity of the tomatoes and enhance the overall flavor. However, it’s not always necessary. If your tomatoes are very ripe and sweet, you may not need to add any sugar at all. Start with a small amount (about 1 teaspoon per quart of sauce) and taste as you go. You can always add more if needed.
What are some tips for making the best homemade tomato sauce?
Use high-quality, ripe tomatoes for the best flavor. Don’t overcrowd the pot when cooking the sauce, as this can lower the temperature and prevent the sauce from thickening properly. Simmer the sauce over low heat for a long period of time to allow the flavors to meld and develop. Taste the sauce frequently and adjust the seasonings as needed. And most importantly, don’t be afraid to experiment and have fun!
Leave a Comment