
Radish harvesting tips are essential for any home gardener looking to enjoy the crisp, peppery flavor of these root vegetables at their peak. Have you ever pulled up a radish, only to find it cracked, woody, or far too spicy? I know I have! It’s a common frustration, but with a few simple tricks, you can avoid these pitfalls and consistently harvest perfect radishes from your own backyard.
Radishes have a surprisingly long and vibrant history. Believed to have originated in Asia, they were cultivated in ancient Egypt and Greece, prized for their nutritional value and medicinal properties. Today, they remain a popular and easy-to-grow crop, making them ideal for beginner gardeners and seasoned pros alike. But even with their ease of cultivation, knowing the right radish harvesting tips can make all the difference.
Why is mastering radish harvesting so important? Because timing is everything! Radishes mature quickly, and if left in the ground too long, they can become tough and lose their desirable flavor. This DIY guide will provide you with the knowledge and techniques to identify the signs of readiness, harvest your radishes at the optimal time, and ensure a bountiful and delicious harvest every time. I’m excited to share these simple yet effective strategies that will transform your radish-growing experience!
Harvesting Radishes: A Beginner’s Guide to Bumper Crops
Okay, so you’ve planted your radishes, patiently watered them, and now you’re wondering, “When do I pull these little guys out of the ground?” Harvesting radishes at the right time is crucial for getting that crisp, peppery flavor we all love. Harvest them too early, and they’ll be tiny and bland. Wait too long, and they’ll become woody, cracked, and overly spicy. Don’t worry, I’m here to guide you through the process!
Knowing When to Harvest: The Visual Cues
The best way to know when your radishes are ready is to check the seed packet. Most varieties mature in about 21-30 days. However, weather conditions and soil quality can affect this timeline. So, don’t rely solely on the calendar. Instead, look for these visual cues:
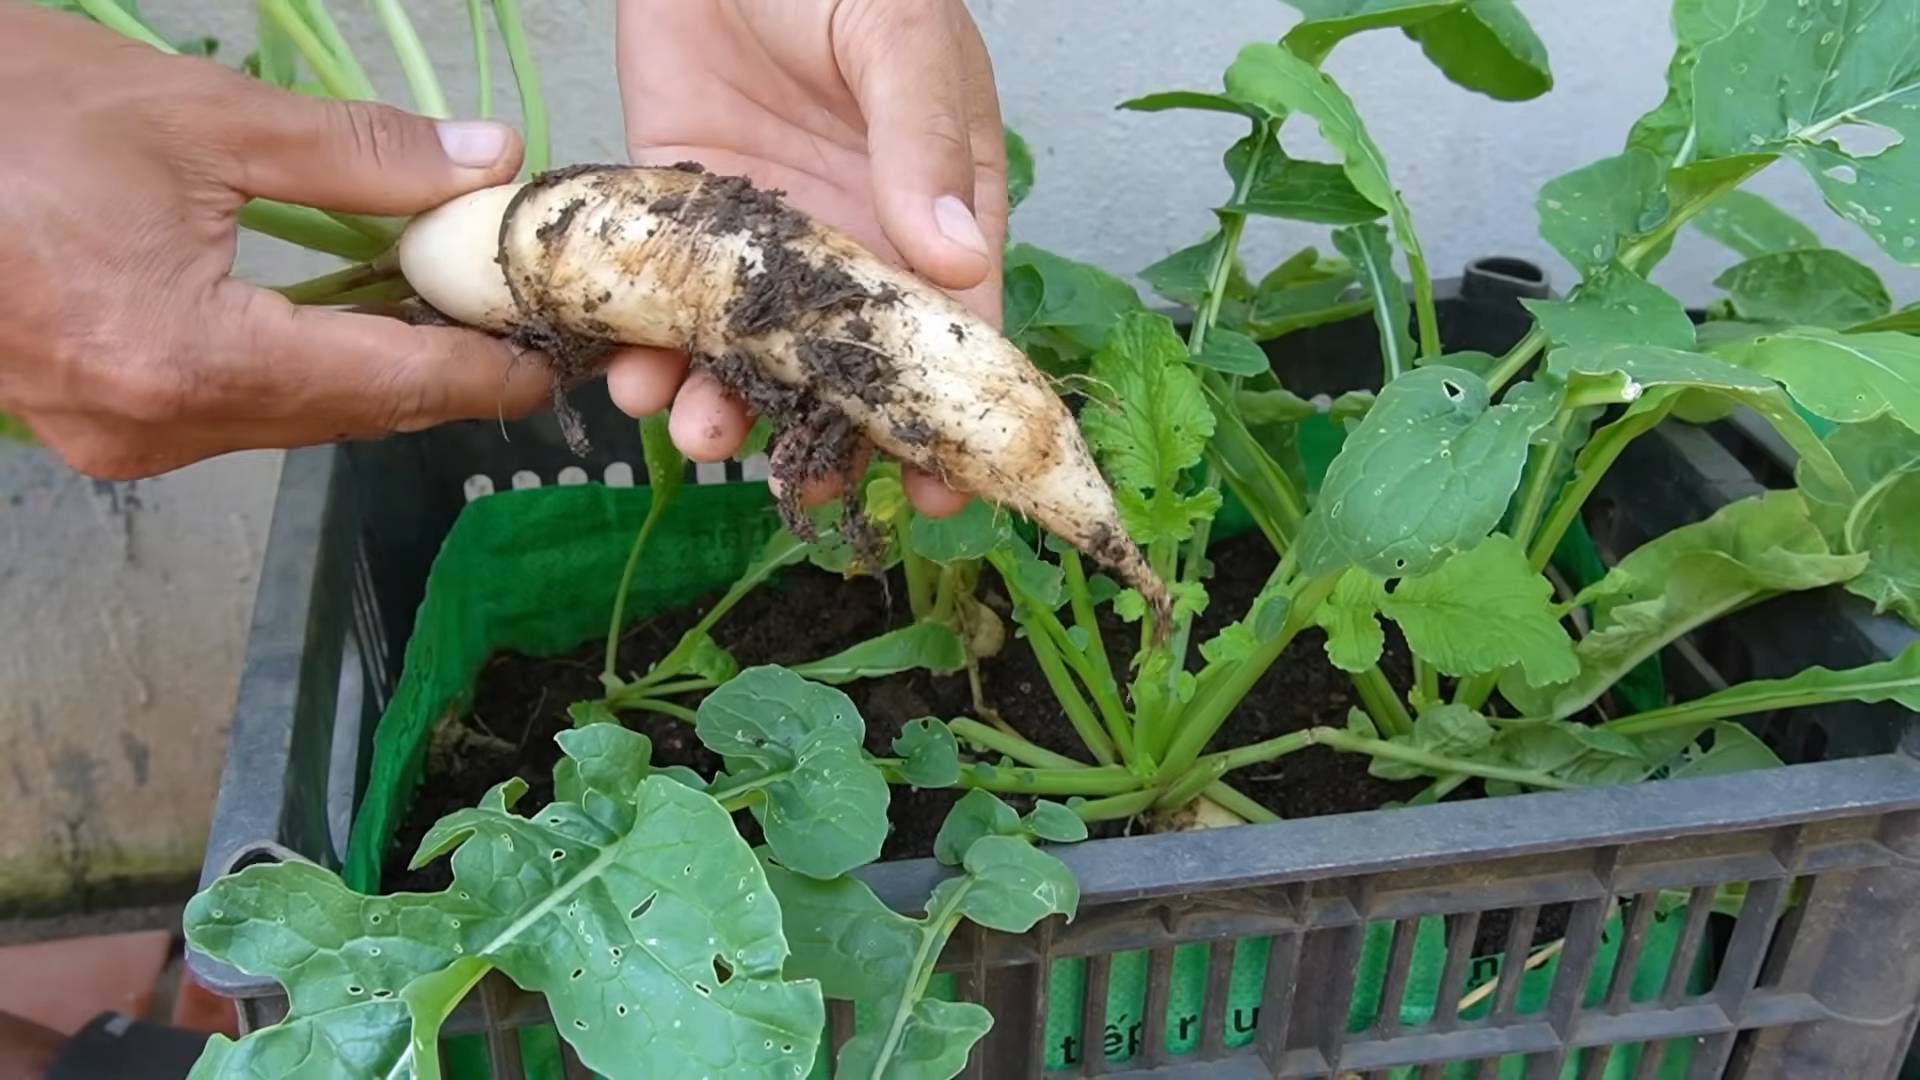
* The Shoulder Test: This is the most reliable method. Gently brush away the soil around the base of a few radishes. You should see the “shoulder” of the radish – the rounded top where the root meets the leaves.
* Size Matters: The size of the radish shoulder is a good indicator of maturity. Most common varieties are ready when the shoulder is about 1 inch in diameter. Check your seed packet for the specific size for your radish variety.
* Leaf Appearance: While not as reliable as the shoulder test, healthy, vibrant green leaves usually indicate a healthy, growing radish. However, don’t rely on this alone, as overgrown radishes can still have healthy leaves.
* Soil Cracking: Sometimes, the growing radish will push against the soil, causing small cracks to appear around the base of the plant. This is a good sign that it’s time to harvest.
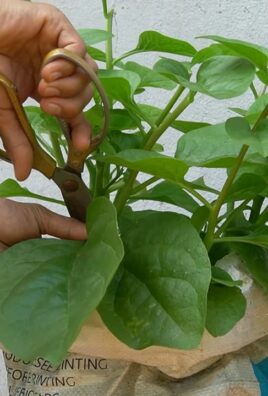
The Gentle Pull: Harvesting Techniques
Once you’ve determined that your radishes are ready, it’s time to harvest! Here’s how to do it without damaging your precious crop:
* Water the Soil: Before you start pulling, water the soil thoroughly. This will loosen the soil and make it easier to pull the radishes without breaking them.
* Grasp and Pull: Gently grasp the radish leaves as close to the base as possible. Pull straight up with a firm, steady motion. Avoid yanking, as this can break the radish.
* Stubborn Radishes: If a radish is particularly stubborn, don’t force it. Use a small trowel or garden fork to loosen the soil around the radish before pulling again.
* Inspect for Damage: After pulling, inspect the radish for any cracks, splits, or insect damage. Discard any damaged radishes, as they won’t store well.
Step-by-Step Harvesting Guide
Here’s a detailed, step-by-step guide to harvesting your radishes:
1. Gather Your Supplies: You’ll need:
* Gardening gloves (optional, but recommended)
* A watering can or hose
* A small trowel or garden fork (if needed)
* A basket or bucket to collect your harvest
* A hose or sink for washing the radishes
2. Water the Radish Bed: Water the radish bed thoroughly the day before or a few hours before you plan to harvest. This will make the soil easier to work with.
3. Identify Mature Radishes: Using the visual cues mentioned earlier (shoulder test, size, leaf appearance, soil cracking), identify the radishes that are ready to be harvested. Start with the largest ones first.
4. Loosen the Soil (If Necessary): If the soil is compacted or the radishes are difficult to pull, use a small trowel or garden fork to gently loosen the soil around the base of the radish. Be careful not to damage the radish itself.
5. Grasp the Leaves: Grasp the radish leaves as close to the base of the plant as possible. Make sure you have a firm grip.
6. Pull Upward: Pull straight up with a firm, steady motion. Avoid twisting or yanking. If the radish breaks, use the trowel or fork to dig it out.
7. Inspect the Radish: After pulling, inspect the radish for any damage. Look for cracks, splits, or insect damage. Discard any damaged radishes.
8. Wash the Radishes: Wash the radishes thoroughly with water to remove any dirt or debris. You can use a hose or a sink.
9. Trim the Leaves and Root: Trim the leaves about 1 inch above the radish. Also, trim the thin root at the bottom of the radish.
10. Store the Radishes: Store the radishes in the refrigerator in a plastic bag or container. They will keep for about a week.
Extending Your Harvest: Succession Planting
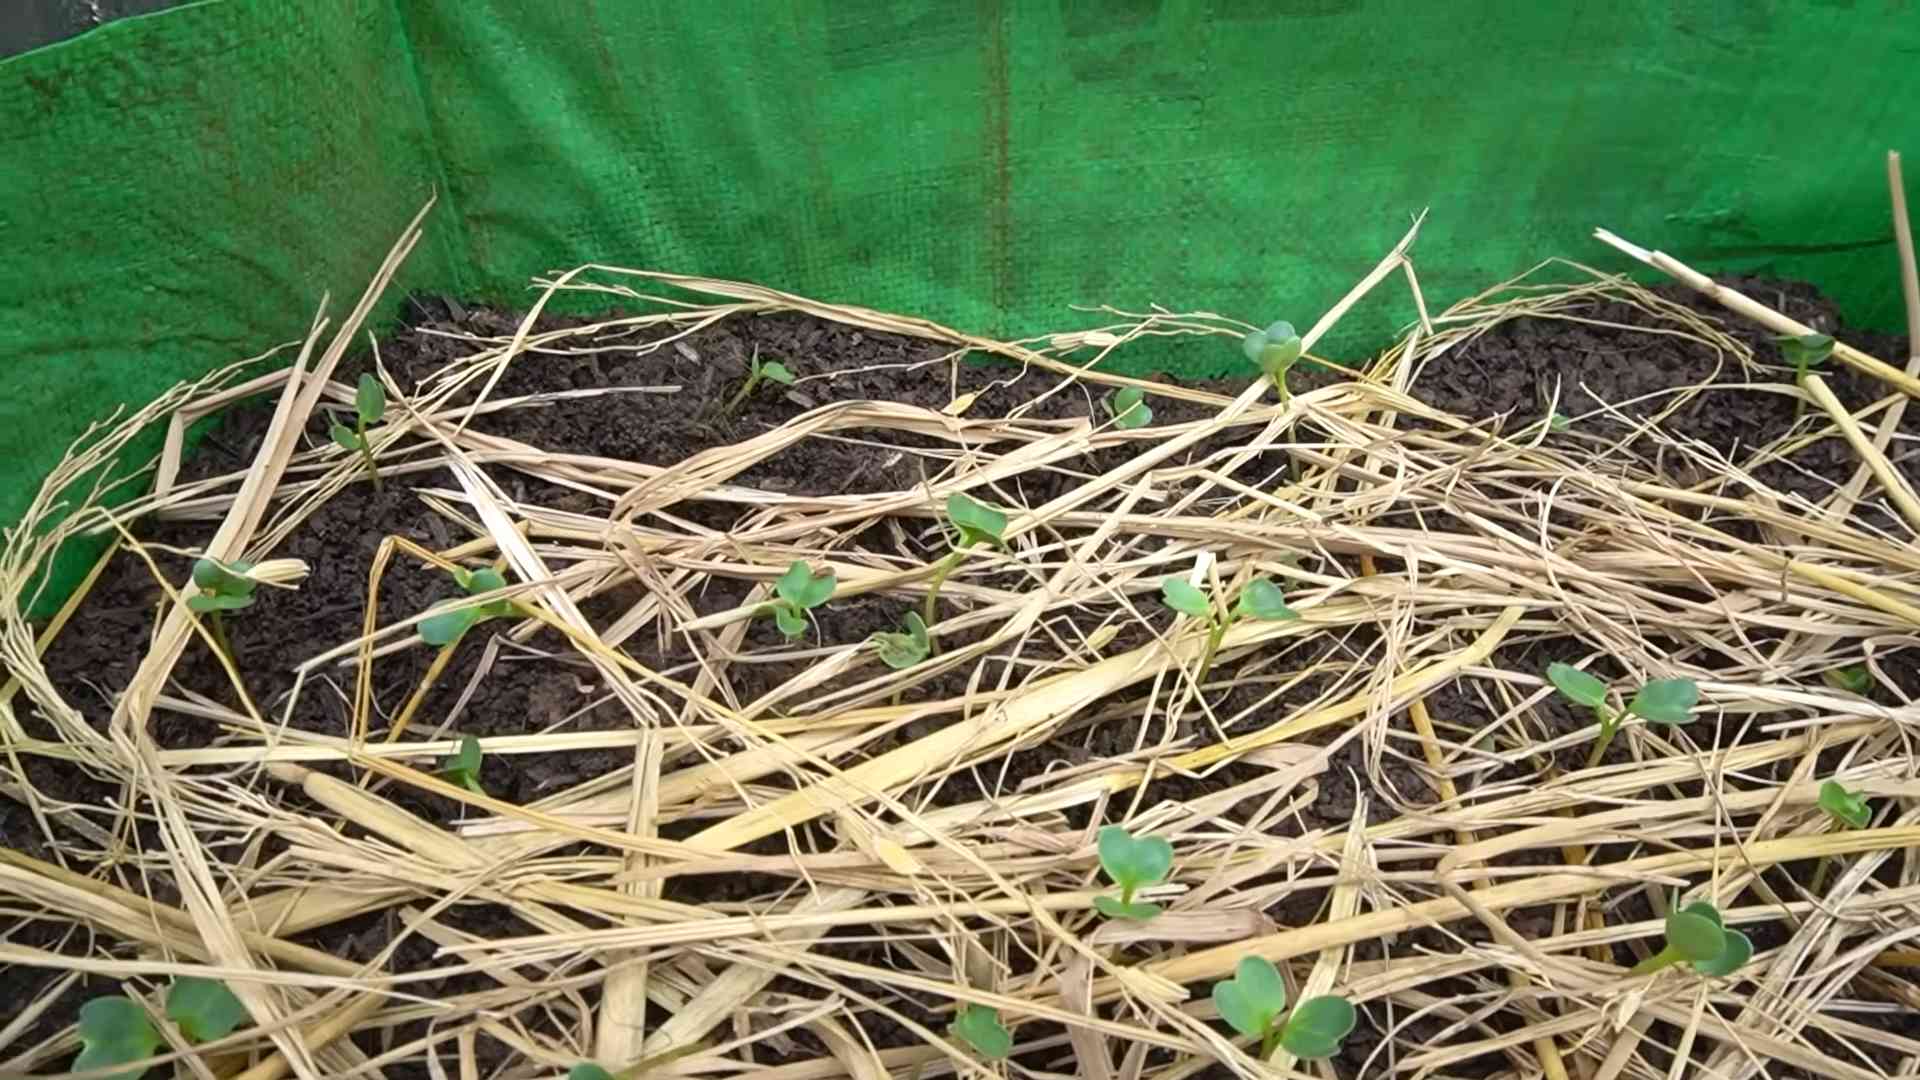
Radishes are quick growers, which makes them perfect for succession planting. This means planting a new batch of radishes every week or two to ensure a continuous harvest throughout the growing season.
* Plan Ahead: Determine how many radishes you want to harvest each week and plant accordingly.
* Small Batches: Plant small batches of seeds rather than one large batch.
* Different Varieties: Consider planting different varieties of radishes with varying maturity dates to extend your harvest even further.
* Record Keeping: Keep track of when you planted each batch of radishes so you know when to expect them to be ready for harvest.
Troubleshooting Common Radish Problems
Sometimes, things don’t go according to plan. Here are some common radish problems and how to address them:
* Radishes are too spicy: This is often caused by hot weather or dry soil. Make sure to water your radishes regularly and provide some shade during the hottest part of the day.
* Radishes are cracked or split: This is usually caused by inconsistent watering. Try to keep the soil consistently moist, but not waterlogged.
* Radishes are small and bland: This can be caused by poor soil quality or overcrowding. Make sure to plant your radishes in well-drained soil that is rich in organic matter. Thin the seedlings to give them enough space to grow.
* Radishes are woody: This is usually caused by harvesting them too late. Harvest your radishes as soon as they reach the desired size.
* Pests and Diseases: Radishes can be susceptible to pests such as flea beetles and root maggots. Use row covers to protect your plants from pests. Diseases are less common, but can occur in wet conditions. Ensure good air circulation and avoid overwatering.
Storing Your Radish Bounty
Proper storage is key to keeping your radishes fresh and crisp. Here’s how to store them:
* Remove the Greens: Cut off the radish greens, leaving about an inch of stem. The greens will draw moisture from the radish, causing it to become soft. You can store the greens separately in a plastic bag in the refrigerator for a few days. They are great in salads or stir-fries.
* Wash and Dry: Wash the radishes thoroughly to remove any dirt. Pat them dry with a clean towel.
* Plastic Bag or Container: Place the radishes in a plastic bag or container lined with a damp paper towel. This will help to keep them moist.
* Refrigerate: Store the radishes in the refrigerator. They will keep for about a week.
* Check Regularly: Check the radishes regularly and discard any that are starting to soften or rot.
Enjoying Your Homegrown Radishes
Now that you’ve harvested and stored your radishes, it’s time to enjoy them! Here are a few ideas:
* Raw: Radishes are delicious eaten raw in salads, sandwiches, or as a snack.
* Roasted: Roasting radishes mellows their flavor and brings out their sweetness.
* Pickled: Pickled radishes are a tangy and flavorful addition to any meal.
* Sautéed: Sautéed radishes are a quick and easy side dish.
* Radish Greens: Don’t forget about the greens! They can be used in salads, stir-fries, or soups.
Choosing the Right Radish Variety
There are many different varieties of radishes to choose from, each with its own unique flavor, size, and color. Here are a few popular varieties:
* Cherry Belle: A classic red radish with a mild flavor.
* French Breakfast: A long, slender radish with a mild, slightly sweet flavor.
* Easter Egg: A mix of colorful radishes in shades of red, pink, purple, and white.
* Black Spanish: A large, black radish with a pungent flavor.
* Watermelon Radish: A large, round radish with a green exterior and a pink interior.
Experiment with different varieties to find your favorites!
Radish Growing Tips for Success
Here are a few extra
Conclusion
So, there you have it! Mastering the art of radish harvesting is simpler than you might think. By paying attention to the signs of maturity, employing the gentle pull-and-twist technique, and understanding the importance of timing, you can ensure a bountiful harvest of crisp, flavorful radishes every time. This isn’t just about pulling a vegetable from the ground; it’s about maximizing the potential of your garden and enjoying the fruits (or rather, roots!) of your labor.
Why is this DIY radish harvesting trick a must-try? Because it directly impacts the quality and taste of your radishes. Harvesting too early results in small, underdeveloped roots lacking that signature radish bite. Harvesting too late leads to woody, cracked, and overly pungent radishes that are far less enjoyable. This method helps you hit that sweet spot, guaranteeing the best possible flavor and texture.
But don’t stop there! Experiment with different radish varieties to discover your favorites. Try growing French Breakfast radishes for their mild flavor and elongated shape, or opt for Watermelon radishes for their stunning pink interior and slightly sweet taste. You can also adjust your planting schedule to ensure a continuous harvest throughout the growing season. Succession planting, where you sow new seeds every few weeks, is a fantastic way to keep your radish supply consistent.
Consider companion planting as well. Radishes are known to deter certain pests and can be planted alongside carrots to help break up the soil. They also thrive near lettuce and spinach, creating a mutually beneficial relationship in your garden.
Furthermore, think about the different ways you can use your freshly harvested radishes. Beyond salads, they can be roasted, pickled, or even used to make a vibrant radish top pesto. Don’t discard the greens! Radish greens are packed with nutrients and can be sautéed, added to soups, or used in salads.
We strongly encourage you to try these radish harvesting tips in your own garden. The difference in taste and texture compared to store-bought radishes is truly remarkable. Once you’ve experienced the satisfaction of harvesting your own perfectly grown radishes, you’ll never look back.
And most importantly, we want to hear about your experience! Share your radish harvesting stories, tips, and photos in the comments below. Let us know what varieties you’re growing, what challenges you’ve faced, and what successes you’ve celebrated. Your insights can help other gardeners learn and grow, creating a thriving community of radish enthusiasts. Did you find that a specific soil type impacted your harvest? Did a particular watering schedule yield better results? Your feedback is invaluable.
So, get out there, get your hands dirty, and start harvesting! With a little practice and these simple tips, you’ll be enjoying a delicious and abundant radish harvest in no time. Remember, the key to successful radish harvesting lies in observation, patience, and a little bit of love for your garden. Happy gardening!
Frequently Asked Questions (FAQ)
What is the best time of day to harvest radishes?
The best time to harvest radishes is generally in the morning, after the dew has dried but before the heat of the day sets in. Harvesting in the cooler morning hours helps to prevent the radishes from wilting quickly. The cooler temperatures also mean the radishes will be crisper and more flavorful. Avoid harvesting during the hottest part of the day, as the radishes may be stressed and more prone to damage.
How do I know when my radishes are ready to harvest?
The most reliable way to determine if your radishes are ready for harvesting is to check the seed packet or plant tag for the expected maturity date. Most radish varieties mature in about 21 to 30 days. However, visual cues are also important. Look for radishes that have reached the size specified on the seed packet. You can also gently brush away the soil around the base of a few radishes to check their size. If they appear to be the correct size and shape, they are likely ready to harvest. Don’t wait too long, as radishes can become woody and bitter if left in the ground for too long.
What happens if I leave radishes in the ground too long?
If you leave radishes in the ground for too long, they can become overgrown, woody, and bitter. The texture will become tough and unpleasant, and the flavor will lose its crisp, peppery bite. Overgrown radishes are also more prone to cracking and splitting. It’s best to harvest radishes when they are at their peak size and flavor, as indicated on the seed packet. Regular monitoring and timely harvesting are key to enjoying the best quality radishes.
Can I harvest just a few radishes at a time, or do I need to harvest them all at once?
You can absolutely harvest just a few radishes at a time, as needed. This is one of the great advantages of growing your own radishes. Simply select the radishes that are the correct size and leave the rest to continue growing. This allows you to enjoy a continuous harvest over a period of several weeks. Be sure to water the remaining radishes regularly to encourage continued growth.
How should I store radishes after harvesting them?
To store radishes after harvesting, first remove the greens, leaving about an inch of stem attached. Wash the radishes thoroughly to remove any dirt or debris. Place the radishes in a plastic bag or container lined with a damp paper towel. Store them in the refrigerator crisper drawer. Radishes stored in this way can last for up to two weeks. The damp paper towel helps to maintain humidity and prevent the radishes from drying out.
My radish greens are turning yellow. What does this mean?
Yellowing radish greens can indicate several potential problems. It could be a sign of overwatering or underwatering, nutrient deficiencies, or pest infestations. Check the soil moisture to ensure it is consistently moist but not waterlogged. If the soil is dry, water deeply. If the soil is waterlogged, improve drainage. Consider fertilizing with a balanced fertilizer to address any nutrient deficiencies. Inspect the leaves for signs of pests, such as aphids or flea beetles. If you find pests, treat them with an appropriate insecticide or organic pest control method.
Can I eat radish greens?
Yes, radish greens are edible and nutritious! They have a peppery flavor similar to the radish root itself. Radish greens can be used in salads, sautéed, added to soups, or used to make pesto. Be sure to wash the greens thoroughly before using them. Choose young, tender greens for the best flavor and texture. Avoid using greens that are yellowed or damaged.
What are some common pests that affect radishes, and how can I control them?
Some common pests that affect radishes include flea beetles, aphids, and root maggots. Flea beetles are small, jumping insects that chew small holes in the leaves. Aphids are small, sap-sucking insects that can cause the leaves to curl and distort. Root maggots are the larvae of certain flies that feed on the roots of radishes, causing them to become damaged and unmarketable.
To control these pests, you can use a variety of methods. For flea beetles, you can use row covers to protect the plants, or spray with an insecticide such as pyrethrin. For aphids, you can spray with insecticidal soap or neem oil. For root maggots, you can use row covers to prevent the flies from laying their eggs, or apply a soil drench of beneficial nematodes. Crop rotation can also help to prevent root maggot infestations.
Are there any companion plants that can help radishes grow better?
Yes, radishes benefit from several companion plants. Carrots and radishes are a classic combination, as radishes help to break up the soil, making it easier for carrots to grow. Lettuce and spinach also make good companions, as they provide shade for the radishes during hot weather. Nasturtiums can help to deter pests, such as aphids and flea beetles. Avoid planting radishes near hyssop, as it can inhibit their growth.
Can I grow radishes in containers?
Yes, radishes are well-suited for container gardening. Choose a container that is at least 6 inches deep and has good drainage. Use a well-draining potting mix. Sow the seeds directly into the container, spacing them about 1 inch apart. Water regularly and fertilize with a balanced fertilizer. Place the container in a sunny location. Container-grown radishes may mature slightly faster than those grown in the ground.
How does soil pH affect radish growth?
Radishes prefer a soil pH between 6.0 and 7.0. If the soil is too acidic (below 6.0), the radishes may not grow well and may be more susceptible to disease. If the soil is too alkaline (above 7.0), the radishes may develop nutrient deficiencies. You can test the soil pH using a soil testing kit. If the soil is too acidic, you can add lime to raise the pH. If the soil is too alkaline, you can add sulfur to lower the pH.
What are some different varieties of radishes I can grow?
There are many different varieties of radishes to choose from, each with its own unique characteristics. Some popular varieties include Cherry Belle (a classic red radish), French Breakfast (an elongated red and white radish), Watermelon Radish (a large radish with a pink interior), and Daikon Radish (a long, white radish). Experiment with different varieties to
Leave a Comment