
Container chili plants – the fiery jewels of any home garden! Imagine plucking fresh, vibrant chilies right from your patio to spice up your next meal. Sounds amazing, right? But let’s be honest, growing chili plants, especially in containers, can sometimes feel like a delicate dance between success and… well, not-so-spicy disappointment.
For centuries, chilies have been more than just a culinary ingredient. Originating in South America, they’ve woven their way into cultures worldwide, used in everything from traditional medicine to vibrant celebrations. Today, the joy of cultivating your own food, coupled with the convenience of container gardening, has made growing container chili plants incredibly popular.
But why bother with these DIY tricks and hacks? Because let’s face it, even with the best intentions, container chili plants can face challenges. From nutrient deficiencies to pesky pests, a little know-how can make all the difference between a bountiful harvest and a plant that’s just… existing. I’m here to share some simple, effective DIY solutions that will help you nurture your chili plants, ensuring they thrive and reward you with a fiery bounty. Get ready to unleash your inner green thumb and transform your patio into a chili paradise!
DIY: Bountiful Container Chili Plants – From Seed to Spice!
Hey there, fellow chili enthusiasts! I’m so excited to share my tried-and-true method for growing a thriving chili garden right on your patio or balcony. Forget those sad, anemic-looking chili plants at the garden center – we’re going to cultivate vibrant, productive plants bursting with flavor. This guide is packed with tips and tricks I’ve learned over the years, so get ready to spice up your life!
What You’ll Need: The Chili Gardener’s Arsenal
Before we dive in, let’s gather our supplies. Having everything on hand will make the process smooth and enjoyable.
* Chili Seeds: This is where the fun begins! Choose varieties that suit your taste and climate. I personally love Jalapeños for their versatility, Habaneros for a fiery kick, and Poblano peppers for stuffing. Look for seeds from reputable suppliers to ensure good germination rates.
* Seed Starting Trays or Small Pots: These will be our nurseries for the baby chili plants.
* Seed Starting Mix: This is a light, sterile mix specifically formulated for seedlings. It provides excellent drainage and aeration.
* Larger Pots (5-10 Gallon): Once the seedlings are strong enough, they’ll need bigger homes. Choose pots with drainage holes!
* Potting Mix: A good quality potting mix is crucial for healthy growth. Avoid garden soil, as it can compact and hinder drainage.
* Slow-Release Fertilizer: This will provide a steady supply of nutrients throughout the growing season.
* Watering Can or Hose: Essential for keeping your chili plants hydrated.
* Plant Labels and a Permanent Marker: Trust me, you’ll want to label your plants, especially if you’re growing multiple varieties.
* Gardening Gloves: To keep your hands clean and protected.
* Optional: Heat Mat and Grow Light: These can significantly improve germination rates and seedling growth, especially in cooler climates.
* Optional: Pruning Shears: For shaping and maintaining your plants.
* Optional: Insecticidal Soap or Neem Oil: To combat any pesky pests that might try to invade your chili paradise.
Phase 1: Starting from Seed – Nurturing the Little Sprouts
This is where patience comes in! Starting from seed allows you to choose from a wider variety of chili peppers and gives you a head start on the growing season.
1. Prepare the Seed Starting Trays: Fill your seed starting trays or small pots with seed starting mix. Gently tamp it down to create a level surface.
2. Sow the Seeds: Make a small indentation (about ¼ inch deep) in the center of each cell or pot. Place 1-2 chili seeds in each indentation.
3. Cover the Seeds: Gently cover the seeds with seed starting mix.
4. Water Thoroughly: Use a watering can with a gentle rose head to thoroughly moisten the soil. Avoid overwatering, which can lead to damping off (a fungal disease that can kill seedlings).
5. Provide Warmth and Light: Chili seeds need warmth to germinate. Ideally, maintain a soil temperature of 75-85°F (24-29°C). A heat mat can be very helpful. Place the trays in a warm, sunny location or under a grow light. If using a grow light, position it a few inches above the trays and keep it on for 14-16 hours per day.
6. Maintain Moisture: Keep the soil consistently moist, but not soggy. You can use a spray bottle to mist the surface of the soil as needed.
7. Be Patient: Chili seeds can take anywhere from 7 to 21 days to germinate, depending on the variety and conditions. Don’t give up!
8. Thin the Seedlings (If Necessary): Once the seedlings have emerged and have a couple of true leaves (the second set of leaves), thin them out if you planted more than one seed per cell or pot. Choose the strongest seedling and carefully snip off the others at the soil line.
Phase 2: Transplanting and Potting Up – Giving Them Room to Grow
Once your seedlings have developed a few sets of true leaves and are a few inches tall, it’s time to transplant them into larger pots.
1. Prepare the Larger Pots: Fill your 5-10 gallon pots with potting mix. Leave a few inches of space at the top.
2. Gently Remove the Seedlings: Carefully remove the seedlings from their seed starting trays or small pots. Be gentle to avoid damaging the roots. You can use a small trowel or spoon to help loosen the soil around the roots.
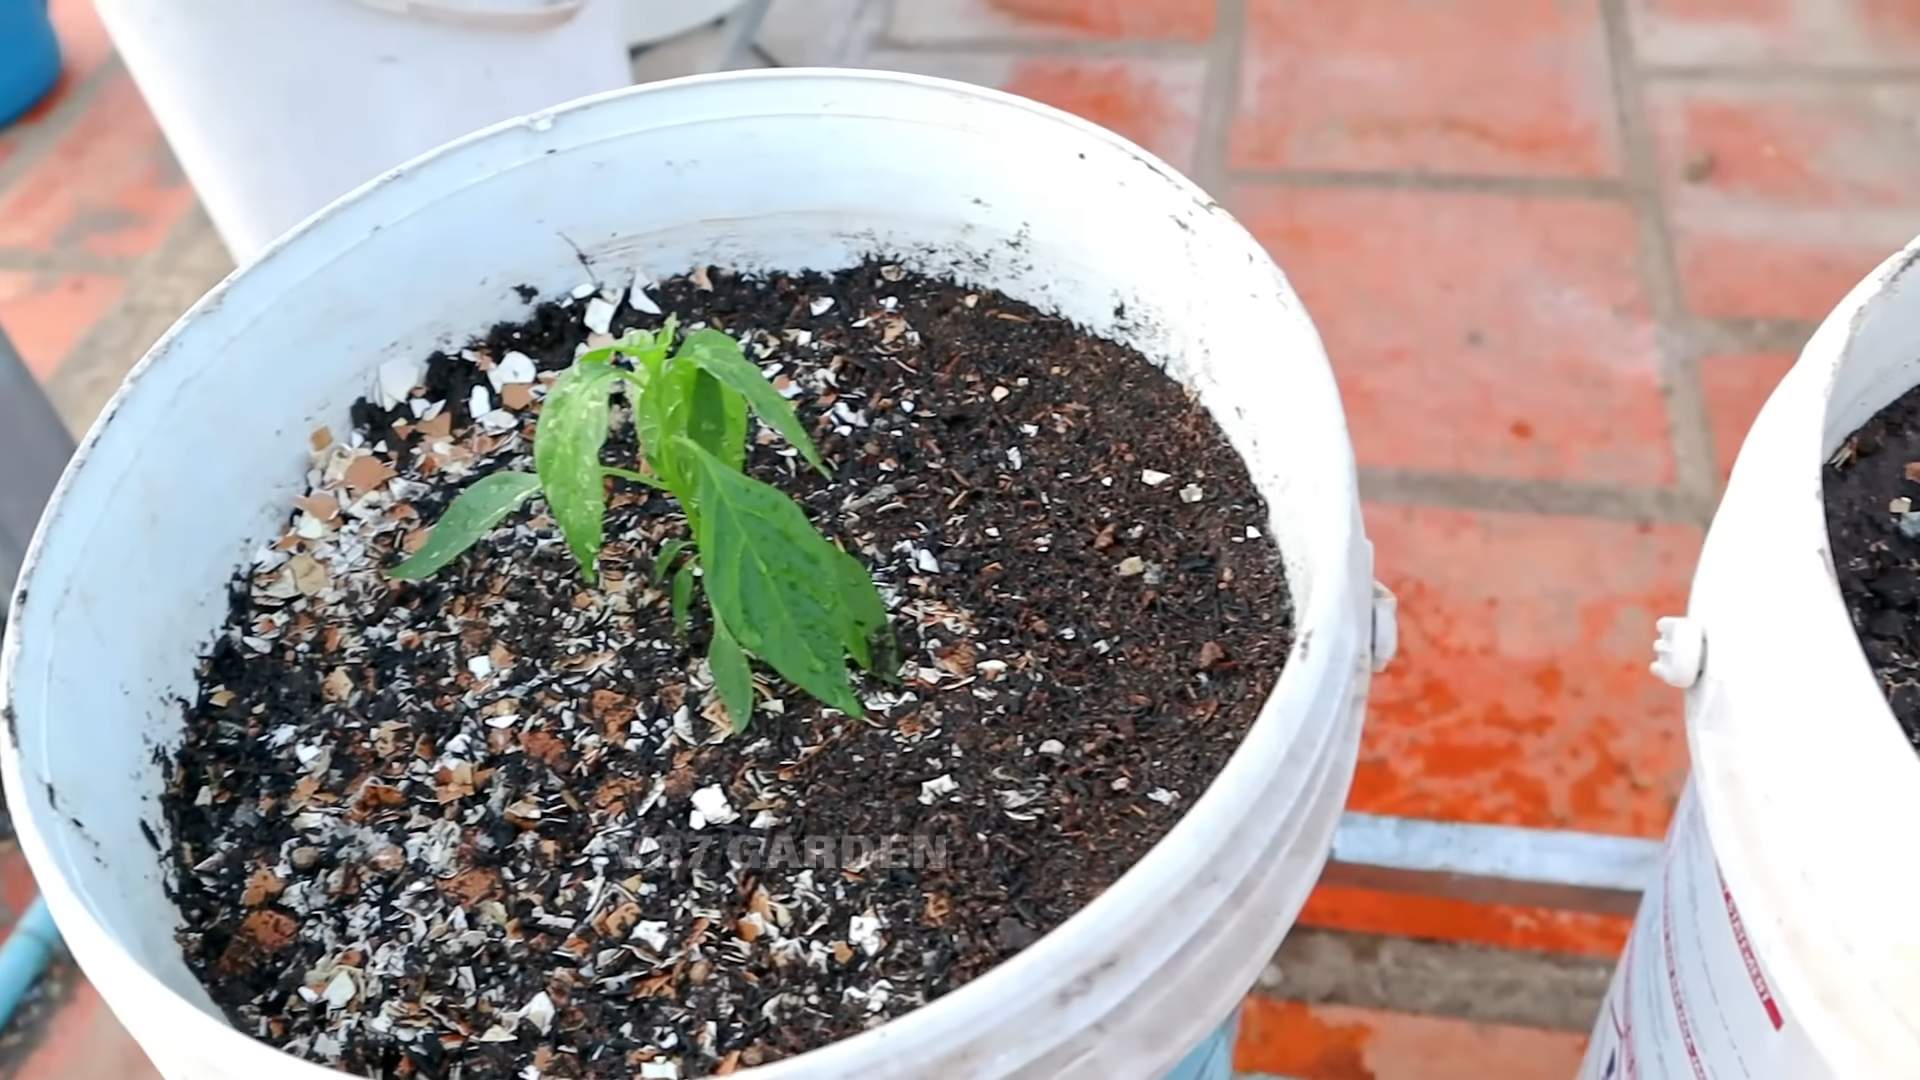
3. Plant the Seedlings: Make a hole in the center of the potting mix in each pot, large enough to accommodate the root ball of the seedling. Place the seedling in the hole and gently backfill with potting mix.
4. Water Thoroughly: Water the newly transplanted seedlings thoroughly.
5. Fertilize: Add a slow-release fertilizer to the potting mix according to the package instructions. This will provide a steady supply of nutrients for the plants.
6. Provide Support (Optional): If you’re growing tall or bushy chili varieties, you may want to provide support with stakes or cages. This will help prevent the plants from toppling over.
Phase 3: Caring for Your Chili Plants – Sunshine, Water, and Love
Now that your chili plants are in their permanent homes, it’s time to provide them with the care they need to thrive.
1. Sunlight: Chili plants need at least 6-8 hours of direct sunlight per day. Choose a sunny location for your containers. If you live in a very hot climate, you may want to provide some afternoon shade to prevent the plants from getting scorched.
2. Watering: Water your chili plants regularly, especially during hot, dry weather. Check the soil moisture by sticking your finger into the soil. If the top inch of soil is dry, it’s time to water. Avoid overwatering, which can lead to root rot. Water deeply, allowing the water to drain out of the drainage holes.
3. Fertilizing: Continue to fertilize your chili plants throughout the growing season. You can use a liquid fertilizer every 2-3 weeks or supplement with compost tea.
4. Pruning: Pruning can help to improve air circulation and encourage bushier growth. Remove any yellowing or dead leaves. You can also pinch back the tips of the branches to encourage more branching.
5. Pest and Disease Control: Keep an eye out for pests and diseases. Common pests that affect chili plants include aphids, spider mites, and whiteflies. You can control these pests with insecticidal soap or neem oil. Common diseases include powdery mildew and blossom end rot. Ensure good air circulation and avoid overwatering to prevent these diseases. Blossom end rot is often caused by calcium deficiency, so you can add calcium to the soil or use a calcium-rich fertilizer.
6. Pollination: Chili plants are self-pollinating, but you can help them along by gently shaking the plants or using a small brush to transfer pollen from one flower to another. This is especially important if you’re growing your plants indoors.
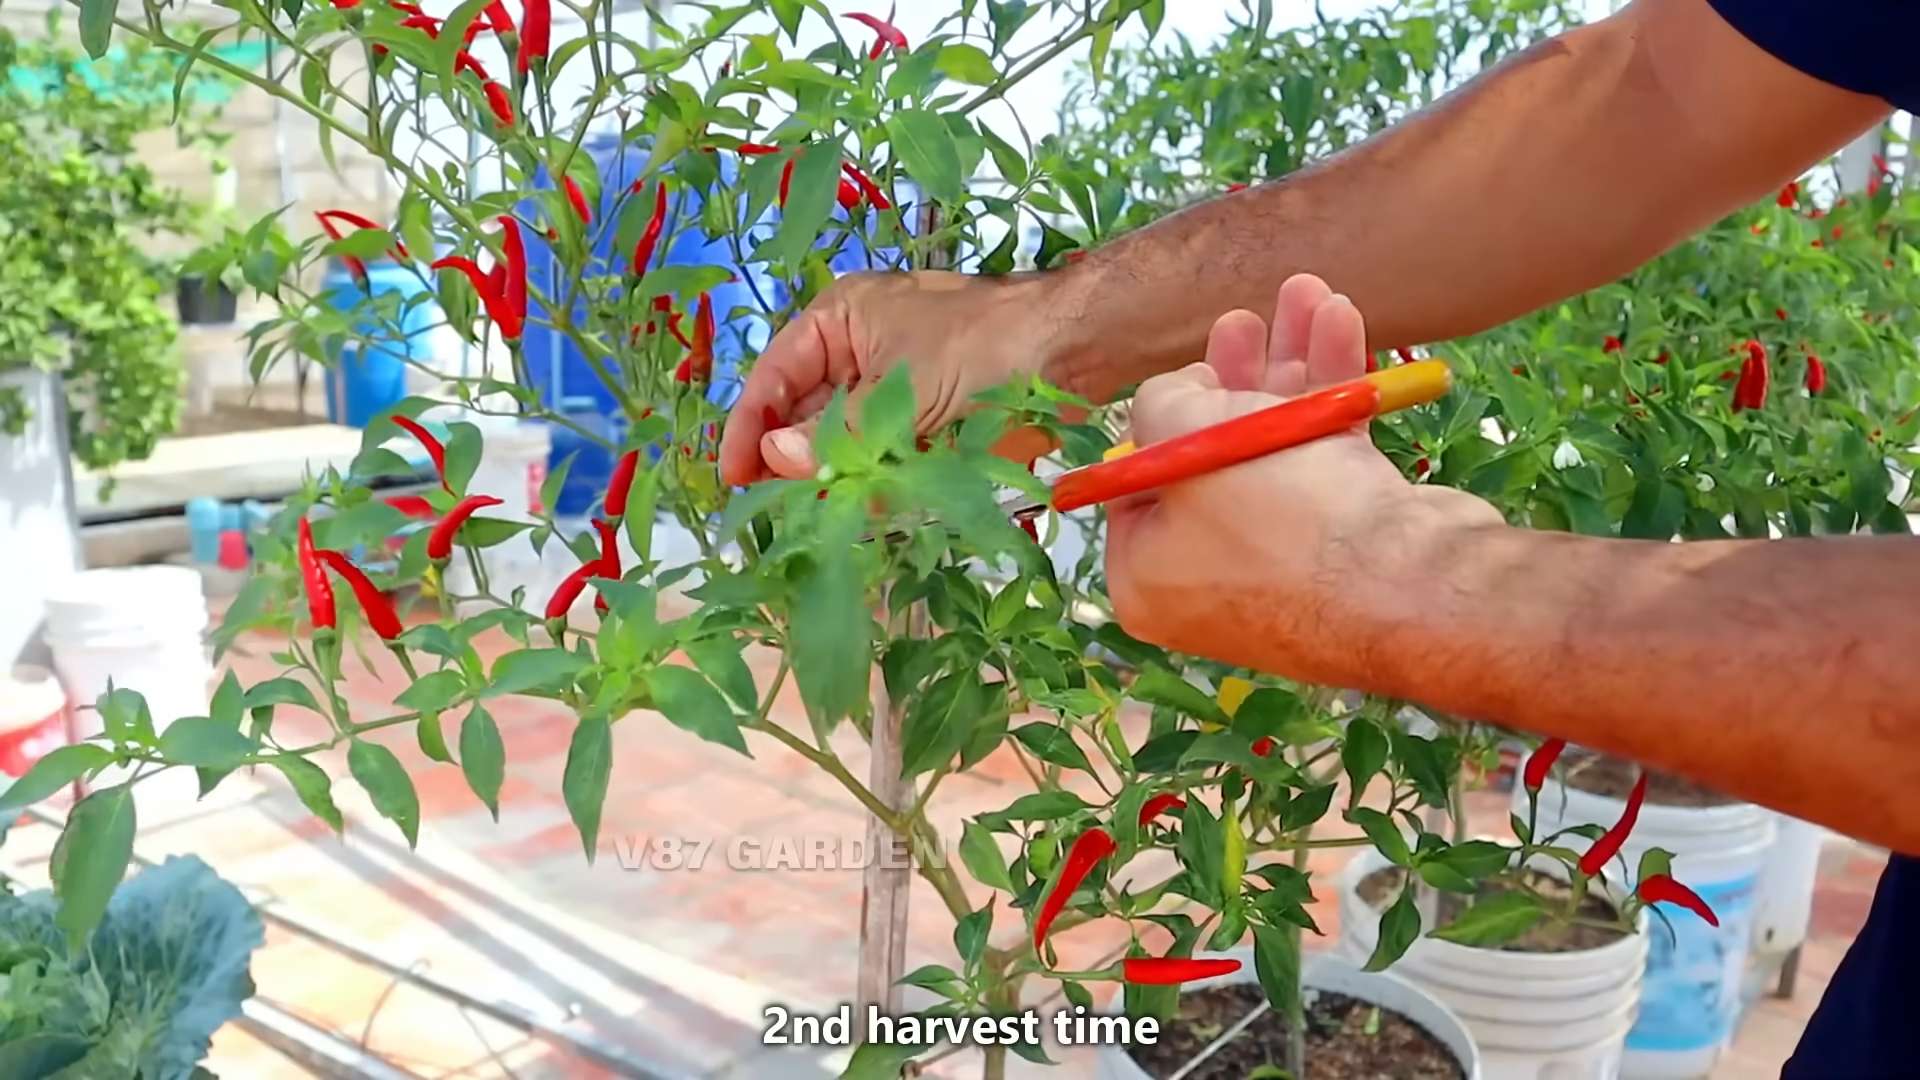
7. Harvesting: The time it takes for chili peppers to mature depends on the variety. Generally, they are ready to harvest when they have reached their mature color and size. Use pruning shears or scissors to cut the peppers from the plant.
Troubleshooting: Common Chili Plant Problems and Solutions
Even with the best care, you might encounter some challenges along the way. Here are a few common problems and how to address them:
* Yellowing Leaves: This can be caused by a variety of factors, including overwatering, underwatering, nutrient deficiencies, or pests. Check the soil moisture and adjust your watering accordingly. Fertilize with a balanced fertilizer. Inspect the plants for pests and treat as needed.
* Blossom Drop: This is when the flowers fall off the plant without producing fruit. It can be caused by high temperatures, low humidity, or lack of pollination. Provide shade during the hottest part of the day. Increase humidity by misting the plants or placing a tray of water near them. Ensure adequate pollination.
* Stunted Growth: This can be caused by poor soil, lack of sunlight, or pests. Repot the plant in fresh potting mix. Move the plant to a sunnier location. Inspect the plants for pests and treat as needed.
* Pests: Aphids, spider mites, and whiteflies are common pests that can infest chili plants. Treat with insecticidal soap or neem oil.
* Diseases: Powdery mildew and blossom end rot are common diseases that can affect chili plants. Ensure good air circulation and avoid overwatering to prevent these diseases. Treat powdery mildew with a fungicide. Add calcium to the soil or use a calcium-rich fertilizer to prevent blossom end rot.
Enjoying Your Harvest: From Garden to
Conclusion
So, there you have it! Transforming your chili plants into prolific producers with this simple DIY trick is not just a possibility, it’s practically a guarantee. We’ve walked you through the process, highlighting the benefits and demystifying any potential challenges. But why is this a must-try? Because it empowers you to take control of your chili pepper harvest, maximizing yield and ensuring a steady supply of spicy goodness right from your own backyard (or balcony!).
Imagine the satisfaction of plucking vibrant, ripe chilies from your container chili plants, knowing you played a direct role in their abundance. Think of the delicious salsas, fiery sauces, and flavorful dishes you can create with your homegrown peppers. This isn’t just about growing plants; it’s about cultivating a connection to your food and experiencing the joy of self-sufficiency.
Beyond the increased yield, this DIY trick promotes healthier, more robust plants. By encouraging stronger root development and improved nutrient uptake, you’re setting your chili plants up for long-term success. And the best part? It’s incredibly easy and cost-effective. You likely already have most of the materials you need right at home.
Ready to take your chili growing game to the next level?
But don’t stop there! Experiment with variations to tailor this trick to your specific needs and preferences. For example, if you’re growing particularly large chili varieties, consider using a slightly larger container to provide ample space for root growth. You can also adjust the frequency of watering and fertilizing based on your local climate and the specific needs of your chili plants.
Consider adding companion plants to your container chili plants. Basil, for instance, is known to repel pests and improve the flavor of chilies. Marigolds are another excellent choice, adding a splash of color while also deterring unwanted insects.
Another variation to consider is the type of growing medium you use. While a standard potting mix is perfectly adequate, you can enhance drainage and aeration by adding perlite or vermiculite. For an even richer growing medium, incorporate compost or well-rotted manure.
Don’t be afraid to experiment with different chili varieties, too! From mild bell peppers to scorching habaneros, there’s a chili pepper out there for everyone. Try growing a mix of different varieties in separate containers to add variety to your harvest.
We are confident that this DIY trick will revolutionize your container chili plants growing experience. But we want to hear from you! Try it out, document your progress, and share your results with us. Post pictures of your thriving chili plants on social media using #ContainerChiliSuccess and tag us so we can see your amazing results. Let’s build a community of chili-growing enthusiasts and learn from each other’s experiences.
Your journey to a bountiful chili harvest starts now! Don’t delay, implement this simple yet effective technique and prepare to be amazed by the transformation of your container chili plants. Happy growing!
Frequently Asked Questions (FAQ)
What exactly is the DIY trick you’re referring to?
The DIY trick involves strategically manipulating the growing environment of your container chili plants to encourage increased fruit production. While the specific technique may vary depending on the article’s content, it generally focuses on optimizing factors like sunlight exposure, watering practices, nutrient availability, and potentially pruning techniques to maximize the plant’s potential for producing chilies. It’s about creating the ideal conditions for your chili plants to thrive and yield a plentiful harvest.
How long will it take to see results from this DIY trick?
The timeframe for seeing noticeable results can vary depending on several factors, including the age and health of your chili plants, the specific chili variety, and the overall growing conditions. Generally, you can expect to see initial signs of improvement within a few weeks of implementing the DIY trick. This might include increased flowering, more robust foliage growth, and the development of new chili peppers. However, it may take a few months to see the full impact of the technique, especially in terms of a significantly increased harvest. Consistent application of the DIY trick and careful monitoring of your plants are key to achieving optimal results.
Is this DIY trick suitable for all types of chili plants?
While this DIY trick is generally applicable to most types of chili plants grown in containers, it’s important to consider the specific needs of your particular chili variety. Some chili varieties may be more sensitive to certain environmental factors or require different nutrient levels. Researching the specific requirements of your chili plants will help you tailor the DIY trick to their individual needs. For example, some varieties may prefer more direct sunlight, while others may thrive in partial shade. Similarly, some varieties may require more frequent watering or fertilization. By understanding the unique needs of your chili plants, you can optimize the DIY trick for maximum effectiveness.
What if I don’t have all the materials mentioned in the article?
Don’t worry if you don’t have all the materials mentioned in the article. Many of the components can be substituted with readily available alternatives. For example, if the article recommends a specific type of fertilizer, you can use a general-purpose fertilizer formulated for vegetables. If you don’t have access to a particular type of soil amendment, you can use compost or well-rotted manure as a substitute. The key is to understand the purpose of each material and find a suitable alternative that serves the same function. In most cases, you can achieve similar results with readily available materials.
Can I use this DIY trick indoors?
Yes, this DIY trick can be adapted for indoor chili plants, but you’ll need to make some adjustments to account for the different growing environment. Indoor chili plants typically require supplemental lighting to compensate for the lack of direct sunlight. You may also need to adjust your watering schedule and humidity levels to create a suitable environment for your plants. Additionally, ensure that your indoor chili plants have adequate ventilation to prevent the buildup of moisture and the development of fungal diseases. With the right adjustments, you can successfully apply this DIY trick to your indoor chili plants and enjoy a bountiful harvest.
What are some common mistakes to avoid when using this DIY trick?
One common mistake is overwatering, which can lead to root rot and other problems. Make sure to allow the soil to dry out slightly between waterings. Another mistake is over-fertilizing, which can burn the roots of your plants. Follow the instructions on the fertilizer label carefully and avoid applying too much. Additionally, be sure to provide your chili plants with adequate sunlight and ventilation. Insufficient sunlight can lead to weak growth and reduced fruit production, while poor ventilation can increase the risk of fungal diseases. By avoiding these common mistakes, you can maximize the effectiveness of the DIY trick and ensure the health and productivity of your chili plants.
How do I know if my chili plants are getting enough sunlight?
The best way to determine if your chili plants are getting enough sunlight is to observe their growth habits. If your plants are leggy and have pale green leaves, they are likely not getting enough sunlight. Conversely, if your plants have dark green leaves and are growing vigorously, they are likely getting sufficient sunlight. You can also use a light meter to measure the amount of light your plants are receiving. Chili plants typically require at least six hours of direct sunlight per day to thrive. If you are growing your chili plants indoors, you may need to supplement with artificial lighting to provide them with the necessary amount of light.
What if I encounter pests or diseases on my chili plants?
If you encounter pests or diseases on your chili plants, it’s important to take action promptly to prevent the problem from spreading. Start by identifying the specific pest or disease affecting your plants. Once you know what you’re dealing with, you can choose an appropriate treatment method. For minor infestations, you may be able to control the problem by handpicking the pests or spraying your plants with a solution of soapy water. For more severe infestations, you may need to use an insecticide or fungicide. Be sure to follow the instructions on the product label carefully and avoid using harsh chemicals that could harm your plants or the environment. Regularly inspect your chili plants for signs of pests or diseases and take action at the first sign of trouble.

Leave a Comment