
Carrot soil bag method: Ever dream of harvesting a bounty of vibrant, sweet carrots without the back-breaking labor of tilling a traditional garden bed? I know I have! For centuries, gardeners have sought innovative ways to cultivate these root vegetables, from raised beds to companion planting. But what if I told you there’s an even simpler, space-saving, and incredibly effective technique that’s taking the gardening world by storm?
This DIY guide unveils the magic of the carrot soil bag method, a game-changer for both seasoned gardeners and beginners alike. Forget about rocky soil, pesky weeds, and limited space. This method allows you to grow beautiful, uniform carrots practically anywhere – on your balcony, patio, or even a sunny windowsill!
Why is this trick so essential? Well, carrots thrive in loose, well-draining soil, and achieving that in a conventional garden can be challenging. The soil bag method provides the perfect environment, ensuring your carrots grow long, straight, and delicious. Plus, it’s a fantastic way to recycle those old potting soil bags and reduce your environmental footprint. So, grab your supplies, and let’s dive into this easy and rewarding gardening adventure! I promise, you’ll be amazed at the results.
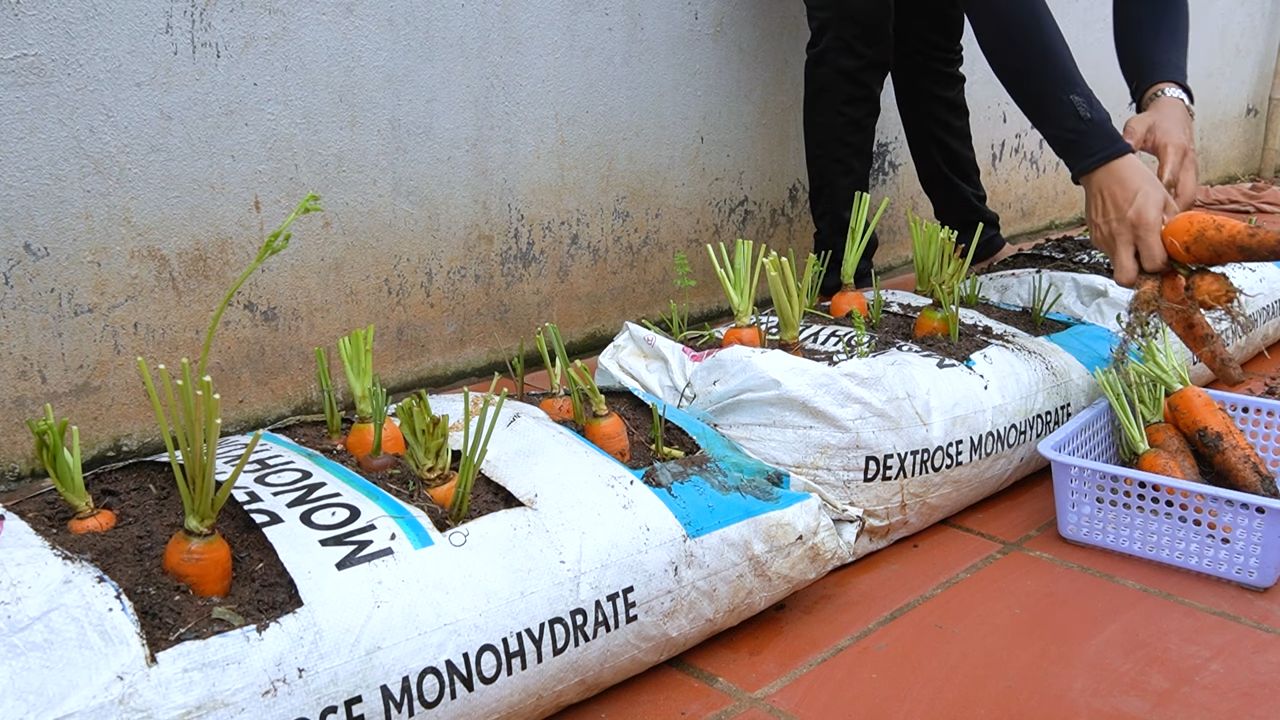
DIY Carrot Growing: The Soil Bag Method for Bumper Crops!
Hey there, fellow gardening enthusiasts! Are you dreaming of pulling up rows of vibrant, crunchy carrots from your own backyard? But maybe you’re short on space, have rocky soil, or just want a super easy way to grow these root veggies? Well, I’ve got the perfect solution for you: growing carrots in soil bags! This method is a game-changer, and I’m excited to share all the details with you. It’s surprisingly simple, incredibly effective, and a whole lot of fun. Let’s get started!
Why Grow Carrots in Soil Bags?
Before we dive into the how-to, let’s quickly touch on why this method is so awesome:
* Space-Saving: Perfect for balconies, patios, or small gardens. You don’t need a huge plot of land to enjoy homegrown carrots.
* Improved Soil Conditions: You control the soil quality, ensuring your carrots have the loose, well-draining environment they need to thrive. No more battling rocky or clay-heavy soil!
* Easy Weed Control: Less weeding compared to traditional garden beds. The enclosed environment helps keep those pesky weeds at bay.
* Better Drainage: Soil bags provide excellent drainage, preventing root rot and other moisture-related problems.
* Portability: You can easily move the bags around to follow the sun or protect them from harsh weather.
* Fun and Accessible: It’s a great project for beginners and experienced gardeners alike. Plus, it’s a fantastic way to get kids involved in gardening!
Materials You’ll Need
Alright, let’s gather our supplies. Here’s what you’ll need to get started:
* Heavy-Duty Soil Bags: These are typically made of woven polypropylene and are available at most garden centers or online. Look for bags that are at least 24 inches tall to give your carrots plenty of room to grow. I usually go for the 30-gallon size.
* High-Quality Potting Mix: This is crucial! Don’t skimp on the potting mix. Choose a blend that’s specifically formulated for vegetables and is loose, well-draining, and rich in organic matter. Avoid using garden soil, as it can be too heavy and compact.
* Carrot Seeds: Select your favorite carrot varieties! Nantes, Chantenay, and Danvers are all popular choices. Consider choosing shorter varieties if you’re using smaller bags.
* Slow-Release Fertilizer: This will provide your carrots with a steady supply of nutrients throughout the growing season. Look for a fertilizer that’s specifically formulated for vegetables.
* Watering Can or Hose: For watering your carrots regularly.
* Scissors or Utility Knife: For making drainage holes in the soil bags.
* Measuring Cup or Scoop: For measuring fertilizer.
* Gloves: To protect your hands.
* Optional: A small trowel or hand rake for spreading the soil evenly.
Step-by-Step Instructions: Planting Your Carrots
Okay, let’s get our hands dirty! Here’s how to plant your carrots in soil bags:
1. Prepare the Soil Bags:
* First, find a suitable location for your soil bags. Choose a spot that receives at least 6-8 hours of direct sunlight per day. Carrots need plenty of sunshine to thrive.
* Next, carefully unfold the soil bags and stand them upright. You might need to shake them a bit to get them to stand properly.
* Now, it’s time to create drainage holes. Using your scissors or utility knife, carefully cut several small slits (about 1-2 inches long) in the bottom of each bag. These holes will allow excess water to drain out, preventing root rot. I usually make about 6-8 holes per bag.
2. Fill the Bags with Potting Mix:
* Slowly start filling the soil bags with your high-quality potting mix. As you fill, gently tap the sides of the bag to help settle the soil and eliminate any air pockets.
* Fill the bags to within about 2-3 inches of the top. This will leave enough room for watering without the soil overflowing.
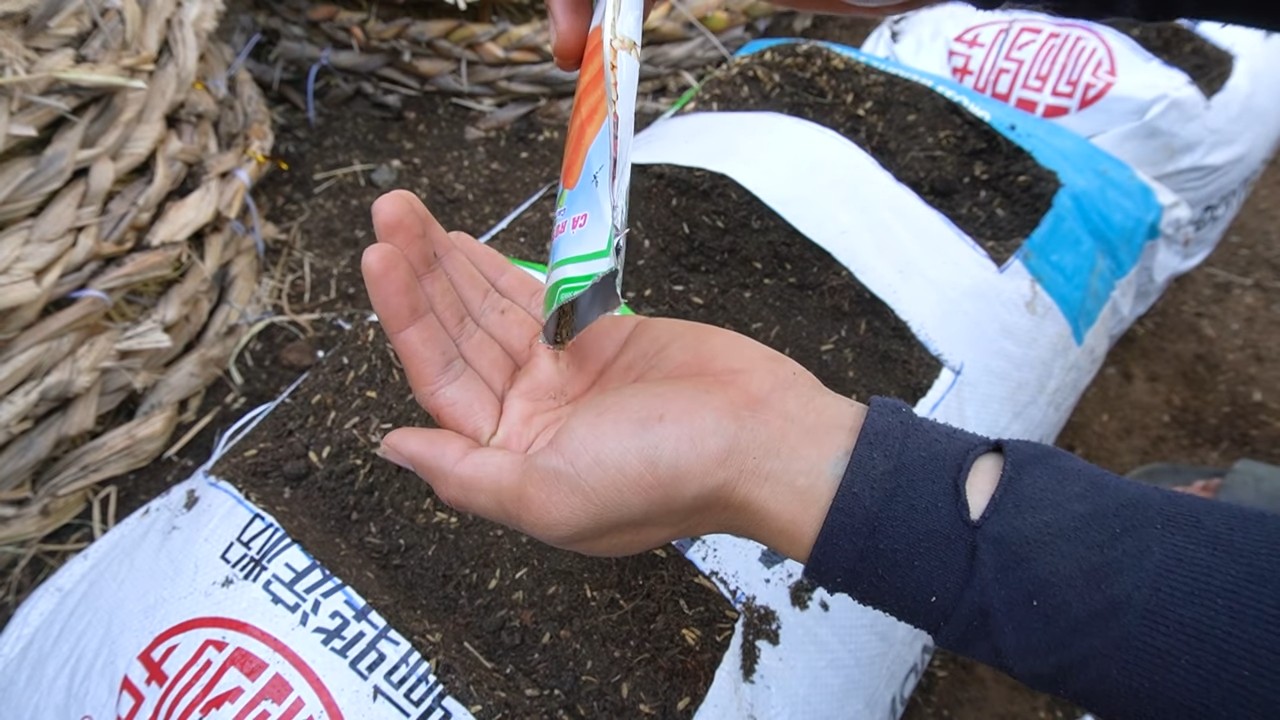
3. Incorporate Fertilizer:
* Now, it’s time to add the slow-release fertilizer. Follow the instructions on the fertilizer package to determine the correct amount to use per bag.
* Sprinkle the fertilizer evenly over the surface of the potting mix.
* Gently mix the fertilizer into the top few inches of the soil using your hands or a small trowel.
4. Sow the Carrot Seeds:
* Carrot seeds are tiny, so it’s important to sow them carefully.
* Moisten the surface of the potting mix with water. This will help the seeds stay in place.
* Sprinkle the carrot seeds evenly over the surface of the soil. Aim for a spacing of about 1-2 inches between seeds. Don’t worry about being too precise; you can always thin them out later.
* Gently press the seeds into the soil with your fingers or a small trowel.
* Cover the seeds with a very thin layer of potting mix (about 1/4 inch).
5. Water Thoroughly:
* After sowing the seeds, water the soil bags thoroughly using a watering can or hose with a gentle spray nozzle.
* Make sure the soil is evenly moist but not waterlogged.
6. Label Your Bags:
* Use a permanent marker to label each bag with the date of planting and the variety of carrots you planted. This will help you keep track of your progress.
Caring for Your Carrots
Now that your carrots are planted, it’s time to provide them with the care they need to thrive. Here’s what you need to do:
1. Watering:
* Keep the soil consistently moist but not waterlogged. Water deeply whenever the top inch of soil feels dry to the touch.
* Water in the morning to allow the foliage to dry before nightfall, which can help prevent fungal diseases.
* Avoid overhead watering, as this can splash soil onto the leaves and increase the risk of disease.
2. Thinning:
* Once the carrot seedlings are about 2-3 inches tall, it’s time to thin them out. This is important to give the remaining carrots enough space to grow.
* Carefully pull out the weaker seedlings, leaving about 2-3 inches between the remaining plants.
* Don’t be afraid to thin them aggressively! Overcrowding can lead to small, stunted carrots.
3. Fertilizing:
* Even with slow-release fertilizer, your carrots may benefit from supplemental feeding during the growing season.
* About halfway through the growing season, apply a liquid fertilizer that’s rich in potassium. Potassium is essential for root development.
* Follow the instructions on the fertilizer package for application rates.
4. Weed Control:
* Although soil bags tend to have fewer weeds than traditional garden beds, it’s still important to keep an eye out for any unwanted plants.
* Remove any weeds as soon as you see them to prevent them from competing with your carrots for nutrients and water.
5. Sunlight:
* Make sure your soil bags are located in a spot that receives at least 6-8 hours of direct sunlight per day.
* If you live in a particularly hot climate, you may need to provide some afternoon shade to prevent the soil from overheating.
6. Pest and Disease Control:
* Keep an eye out for common carrot pests, such as carrot rust flies and aphids.
* If you notice any signs of pests or diseases, take action immediately. You can use organic pest control methods, such as insecticidal soap or neem oil.
* Good air circulation can help prevent fungal diseases.
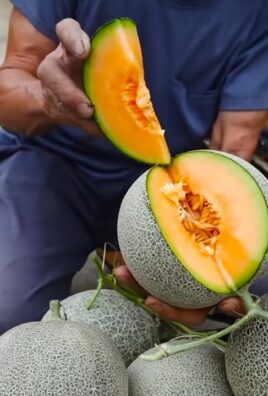
Harvesting Your Carrots
The moment we’ve all been waiting for! Here’s how to harvest your carrots:
1. Check for Maturity:
* Carrots are typically ready to harvest about 60-80 days after planting, depending on the variety.
* Check the seed packet for the specific maturity date for your carrots.
* You can also gently brush away some of the soil around the base of the plants to check the size of the carrots.
2. Harvesting:
* To harvest your carrots, gently loosen the soil around the base of the plants with a trowel or hand fork.
* Grasp the carrot tops firmly and pull straight up.
* If the carrots are difficult to pull, you may need to loosen the soil further.
* Brush off any excess soil from the carrots.
3. Storing:
Conclusion
So, there you have it! The carrot soil bag method – a simple, effective, and surprisingly rewarding way to cultivate delicious, homegrown carrots, even without a traditional garden plot. We’ve explored the ins and outs of this technique, highlighting its accessibility, space-saving benefits, and the joy of harvesting vibrant, flavorful carrots right from your own backyard (or balcony!).
Why is this a must-try? Because it democratizes gardening. It removes the barriers of large plots, specialized equipment, and extensive gardening knowledge. Whether you’re a seasoned gardener looking for a new, efficient method or a complete beginner eager to dip your toes into the world of homegrown produce, the carrot soil bag method offers a low-risk, high-reward experience. Imagine the satisfaction of pulling up those bright orange beauties, knowing you nurtured them from seed to table.
But the beauty of this method lies not only in its simplicity but also in its adaptability. Feel free to experiment!
* Variations on a Theme: Try different carrot varieties! Nantes, Chantenay, or even rainbow carrots will thrive in your soil bags. Consider adding companion plants like marigolds or basil around the base of the bags to deter pests.
* Soil Amendments: While the recommended soil mix works wonders, don’t be afraid to tweak it based on your local climate and soil conditions. Adding a bit of compost or aged manure can further enrich the soil and boost carrot growth.
* Container Options: While we’ve focused on soil bags, you can adapt this method to other containers like large buckets, plastic tubs, or even repurposed grow bags. Just ensure they have adequate drainage.
The key takeaway is to embrace the process, learn from your experiences, and most importantly, have fun! Gardening should be a source of joy and relaxation, and the carrot soil bag method perfectly embodies that spirit.
We are confident that once you try this method, you’ll be hooked. The taste of freshly harvested, homegrown carrots is simply unparalleled. Plus, you’ll be reducing your carbon footprint by growing your own food and minimizing trips to the grocery store.
So, grab a bag of soil, some carrot seeds, and get ready to embark on a rewarding gardening adventure. We encourage you to document your journey, share your successes (and even your challenges!), and inspire others to embrace the joy of growing their own food.
Don’t forget to share your experiences with us! Post photos of your carrot harvests on social media using #CarrotSoilBagMagic and tag us so we can celebrate your gardening triumphs. We can’t wait to see what you create! This **carrot soil bag method** is a game changer for urban gardeners and anyone looking for a simple, effective way to grow their own delicious carrots. Happy gardening!
Frequently Asked Questions (FAQ)
What type of soil is best for the carrot soil bag method?
The ideal soil mix for growing carrots in soil bags is a well-draining, loose, and nutrient-rich blend. A combination of potting mix, compost, and perlite or vermiculite works exceptionally well. The potting mix provides a good base, the compost adds essential nutrients, and the perlite or vermiculite improves drainage and aeration. Avoid using heavy clay soil, as it can hinder root development and result in stunted or misshapen carrots. You can also purchase specialized “carrot mix” soil blends from garden centers, which are formulated to meet the specific needs of carrot plants. Remember, good drainage is crucial to prevent root rot and ensure healthy carrot growth.
How often should I water my carrot soil bags?
Watering frequency depends on several factors, including the weather, the size of the bag, and the type of soil you’re using. Generally, you should aim to keep the soil consistently moist but not waterlogged. Check the soil moisture level regularly by sticking your finger about an inch or two into the soil. If it feels dry to the touch, it’s time to water. During hot, dry weather, you may need to water daily, while during cooler, wetter periods, you can reduce the frequency. When watering, water deeply and thoroughly, ensuring that the entire soil bag is moistened. Avoid overhead watering, as it can promote fungal diseases. Instead, water at the base of the plants or use a soaker hose.
How much sunlight do carrots need when grown in soil bags?
Carrots thrive in full sun, which means they need at least 6-8 hours of direct sunlight per day. Choose a location for your soil bags that receives ample sunlight throughout the day. If you live in a particularly hot climate, providing some afternoon shade can help prevent the soil from drying out too quickly and protect the plants from heat stress. If you don’t have access to a sunny outdoor space, you can supplement with grow lights. Position the grow lights a few inches above the plants and provide 14-16 hours of light per day.
When is the best time to plant carrots in soil bags?
The best time to plant carrots depends on your climate. Carrots are cool-season crops and prefer temperatures between 60°F and 70°F (15°C and 21°C). In areas with mild winters, you can plant carrots in the fall for a winter or early spring harvest. In colder climates, plant carrots in the spring, as soon as the soil is workable. You can also start seeds indoors 4-6 weeks before the last expected frost and transplant them into soil bags once the weather warms up. Succession planting, where you sow seeds every 2-3 weeks, can help extend your harvest season.
How do I prevent pests and diseases in my carrot soil bags?
Preventing pests and diseases is essential for a successful carrot harvest. Here are some tips:
* Choose disease-resistant varieties: Select carrot varieties that are known to be resistant to common diseases.
* Practice crop rotation: Avoid planting carrots in the same soil bag year after year.
* Maintain good drainage: Ensure that your soil bags have adequate drainage to prevent root rot.
* Water properly: Avoid overhead watering and water at the base of the plants.
* Control weeds: Weeds can harbor pests and diseases, so keep your soil bags weed-free.
* Use organic pest control methods: If you encounter pests, try using organic pest control methods like insecticidal soap or neem oil.
* Companion planting: Plant companion plants like marigolds or basil around your carrot soil bags to deter pests.
How do I know when my carrots are ready to harvest?
Carrots are typically ready to harvest 60-80 days after planting, depending on the variety. The best way to determine if your carrots are ready is to check their size. Gently brush away the soil around the top of the carrot to see its diameter. Most carrot varieties are ready to harvest when they are about 1/2 to 1 inch in diameter at the top. You can also harvest a few carrots early to check their taste and texture. To harvest, gently loosen the soil around the carrot and pull it straight up. If the soil is compacted, you may need to use a garden fork to loosen it.
Can I reuse the soil from my carrot soil bags?
Yes, you can reuse the soil from your carrot soil bags, but it’s essential to replenish the nutrients and improve the soil structure. After harvesting your carrots, remove any remaining plant debris and weeds. Amend the soil with compost, aged manure, or other organic matter to replenish the nutrients that were used by the carrots. You can also add perlite or vermiculite to improve drainage and aeration. If you suspect that the soil may be contaminated with pests or diseases, you can sterilize it by baking it in the oven at 180°F (82°C) for 30 minutes. Alternatively, you can solarize the soil by covering it with clear plastic for several weeks during the hottest part of the summer.
Leave a Comment